Unity Crash Course
Author: Chokyi Ozer (IF 2018)
In this tutorial, we will be making a simple top-down maze game with Unity. This course is aimed for complete beginners with basic knowledge of coding, and can understand the basics of the C# programming language.
This course does not require any other downloadable content other than Unity. You can download the latest version of Unity Hub in Unity's website (unity.com). This article covers the creation of a project from a fresh install of Unity.
You can also see the full project on this link: https://github.com/ozer0532/G003_SimpleMazeGame
Table of Contents
Section 1 - Intro to Unity
Press Any Key to Start
This section will teach you how to activate a new license and create a new project. If you are new to Unity, it is advised that you read this section.
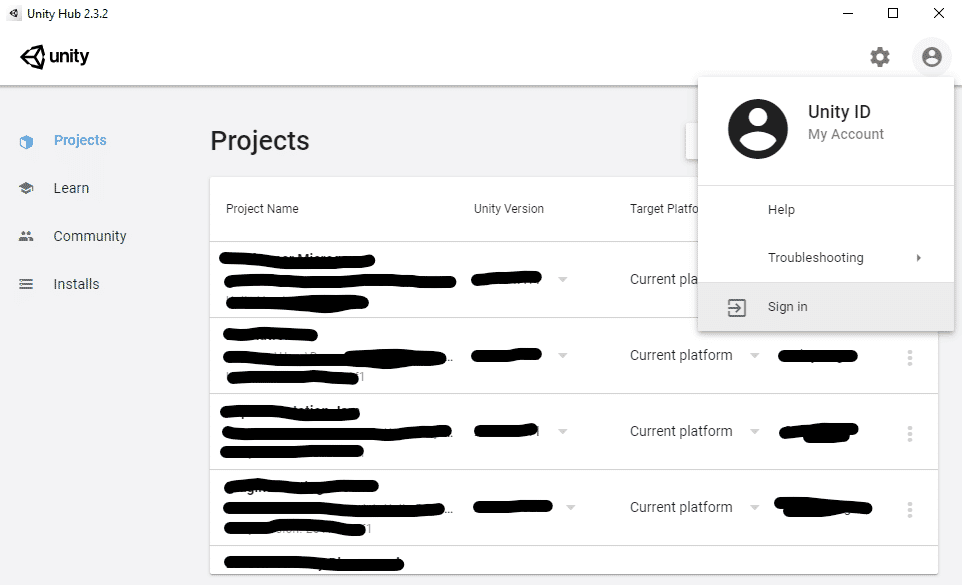
After installing Unity Hub, you will need to login to an existing account before you are able to make a new project. If you are new to Unity, you might not have any projects present on the list. Press on the user icon and sign in
After logging in, select the user icon again and select "Manage license".

Here, select "Activate New License" to use a new license. Your screen might not show any licenses here yet, so your window might look slightly different.

Select Unity Personal if you do not have any paid licenses yet, and click Done

After activating your license, make sure that you have a Unity version installed. Go to the installs tab and select Add to download and install a new license.
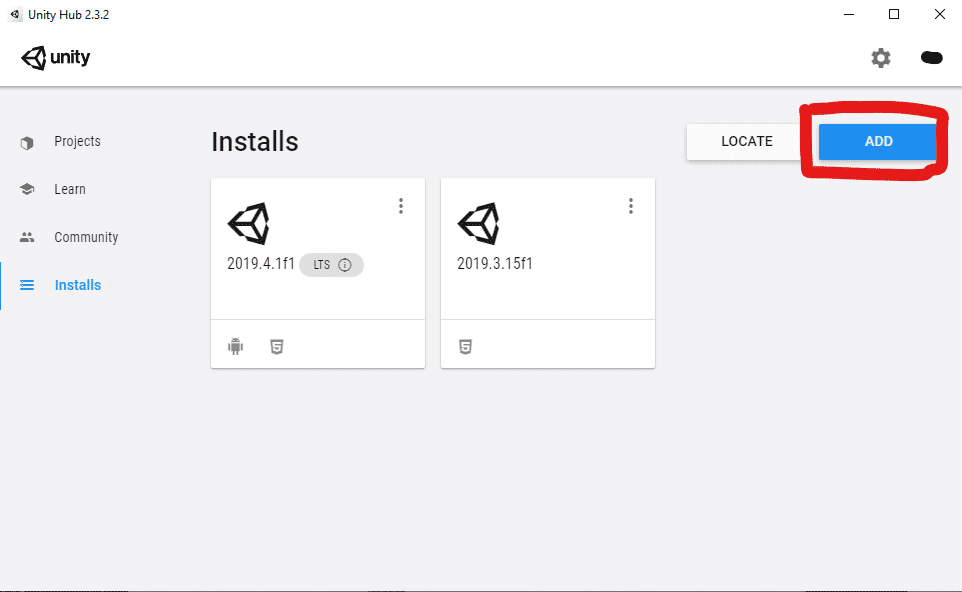
Adding a new Unity version.
Select a Unity version from the pop up window. It is recommended to use the latest official release of Unity (this tutorial is made in 2019.4, but tested for 2020.1 and should still work on newer versions. You might see slightly different UI on newer versions). Then, add the Windows Build Support (IL2CPP) module on the next page. It is also recommended that you install Microsoft Visual Studio Community if you currently do not have an IDE/code editor.
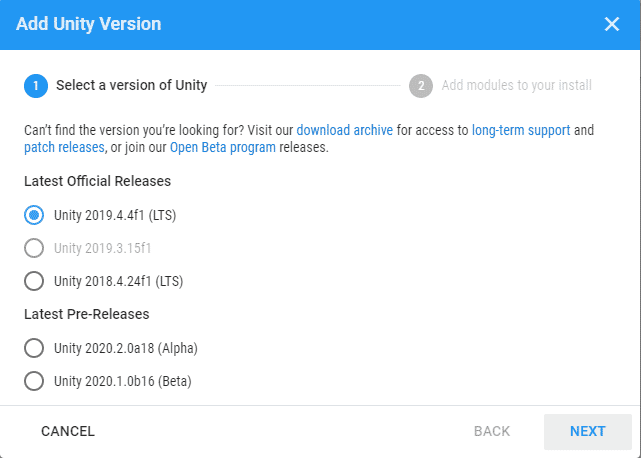
Select a Unity Version
After the installation, create a new project by pressing new.

In the pop up window, select Universal Render Pipeline as the starting template. Name your project and pick a location where you want to save your project in.
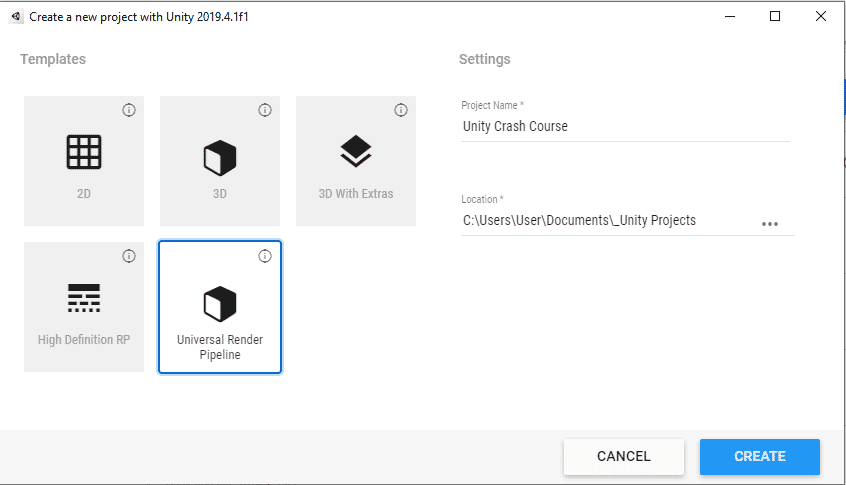
Select Universal Render Pipeline
Scene View Controls
This section will explain the controls to move around in the scene view. Feel free to skip to the next section.
Right off the bat, we are greeted with a simple scene showing some example assets.

Example scene
To look around the scene, hold right click inside the scene view window and drag the mouse around the screen. The camera will start looking around following the mouse.

Scene view window
You can use the scroll wheel to zoom in and out.
While holding right click, use QWEASD to move the camera around the scene. You can also hold shift to move around faster around the scene.
You can select objects with the left mouse button. You can also select multiple objects whilst holding the shift key. Selected objects are indicated with an outline
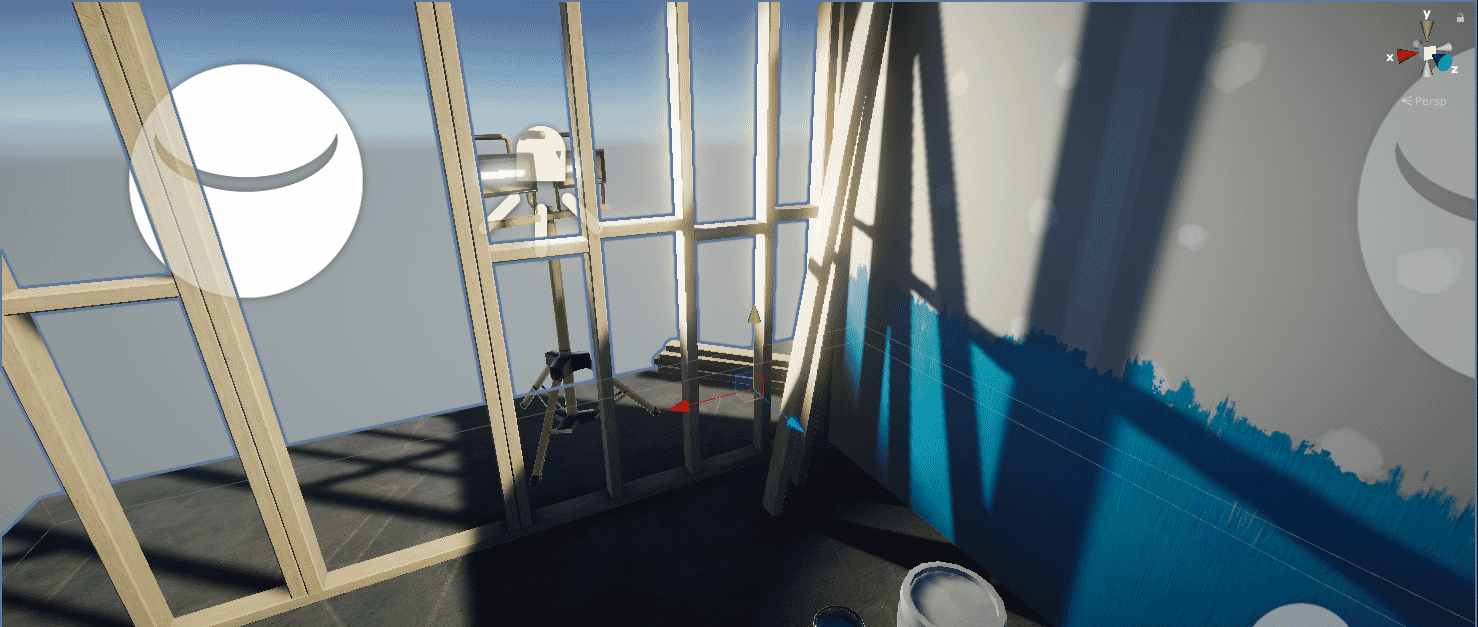
You can use the red, green, and blue arrows to move objects around the scene along an axis. You can also use the red, green, and blue squares to move objects along a plane. Holding Ctrl while dragging will move the object in increments of 0.25 units.
Moving the lamp behind the stack of planks
If there are no arrows that appeared, you can change to the tool you are using by selecting the appropriate tool in the toolbar, placed on the top left corner of the screen. You can also use the following shortcuts to change tools quickly with the keyboard. Q - Hand Tool; W - Move Tool; E - Rotate Tool; R - Scale Tool; T - Rectangle Tool; Y - Multi Tool.
The toolbar
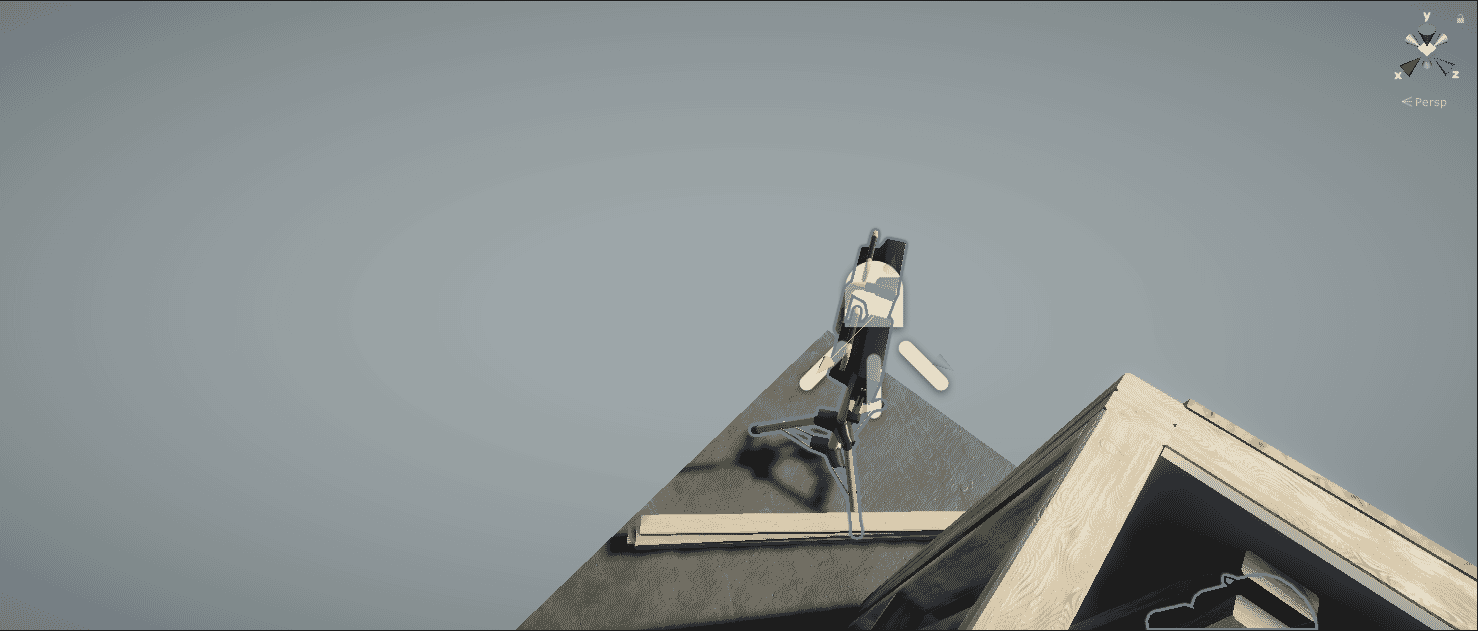
To use the Rotate Tool, select it from the toolbar, and drag the red, green, blue, or white outline of the ball, or drag the ball itself. Snap to increments of 15 degrees while holding the Ctrl key.

You can use similar controls with the scale tool. Experiment with what you can do with it. (Hint: you can probably guess what it does.)
The Unity Window
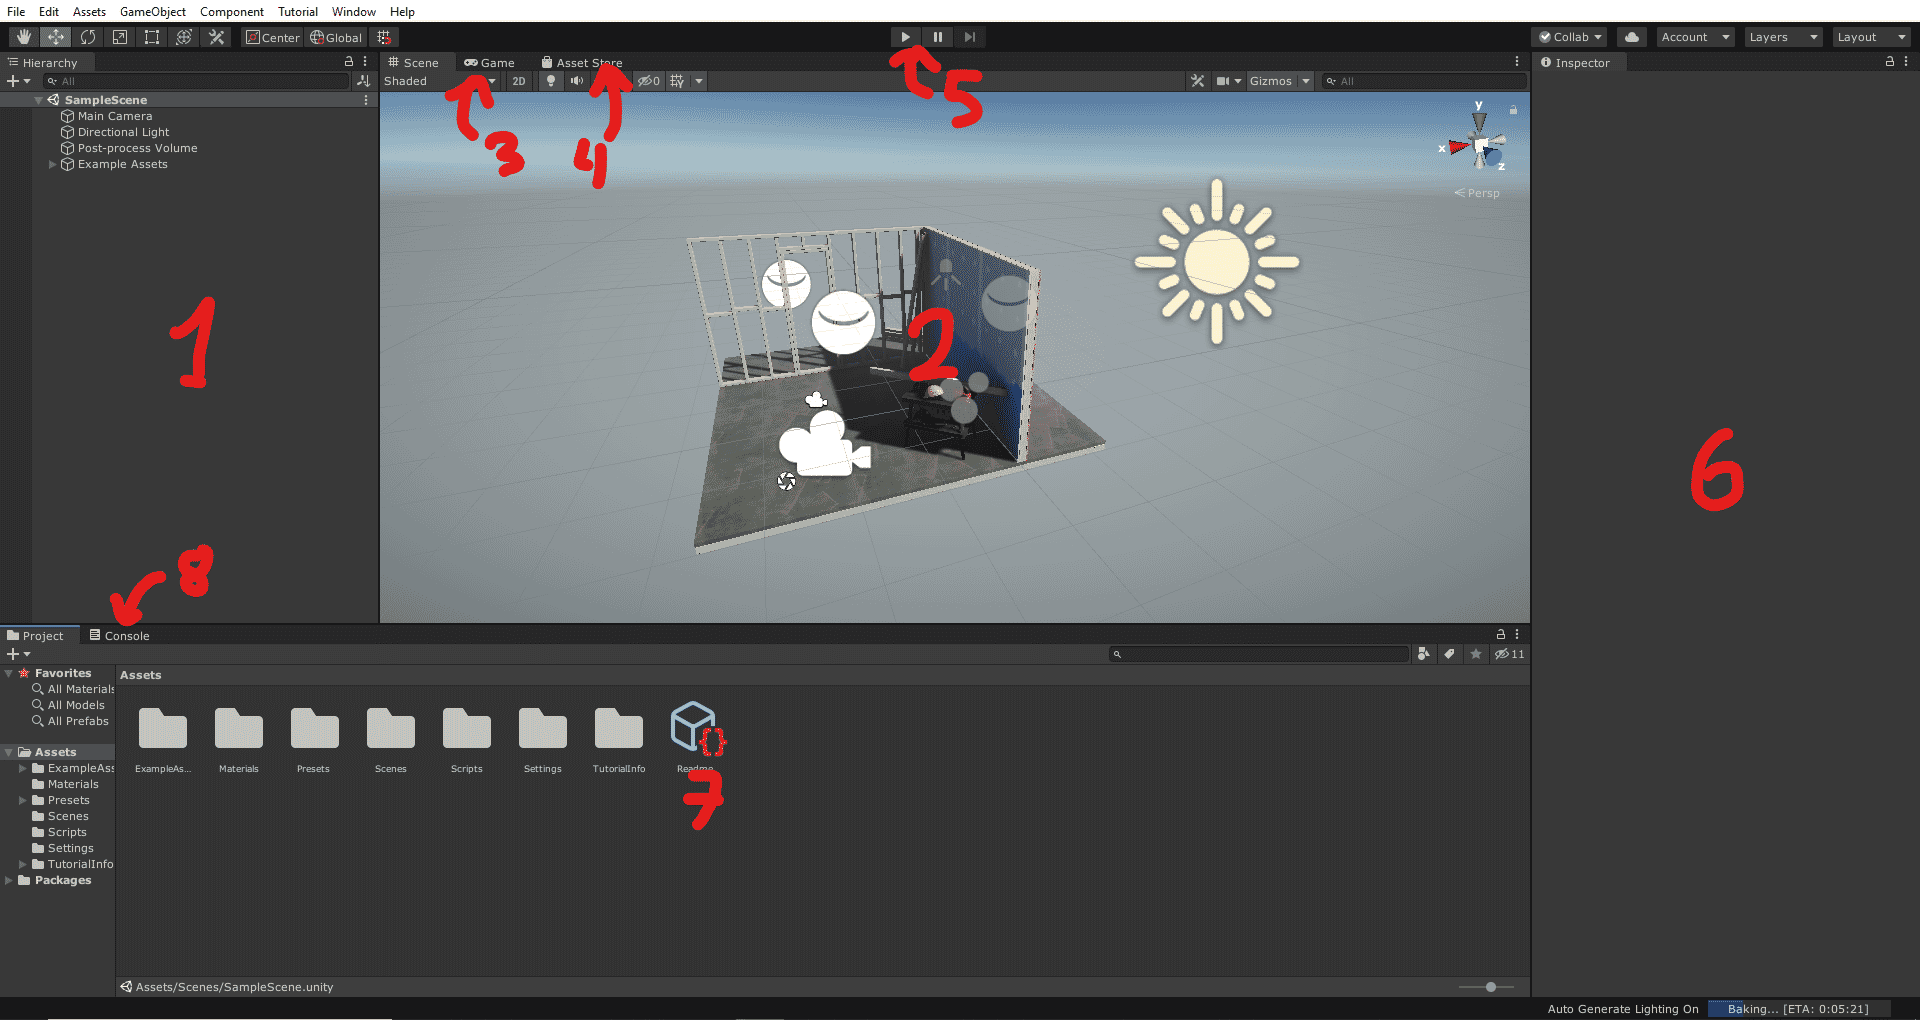
There are other windows that exist in the window.
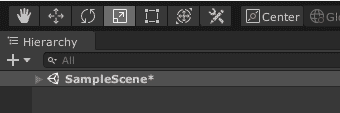
- The Hierarchy contains all objects that exists in the current loaded scene. Each objects can have child objects, and thus can be nested. Objects in blue are prefabs, and will be explained in a later section.
- The Scene View is where you can see the layout of your scene. Most objects in the scene are laid out using the scene view.
- The Game View is where you playtest your game. It shows how your game will look when played.
- The Asset Store (normally not visible to new users, soon to be deprecated) is where you can get download and import assets obtained from the Unity Asset Store. The Asset Store is accessible inside Unity with Ctrl+9 or through Window > Asset Store.
- The Toolbar, although not a window, holds tools commonly used in the Scene View Window.
- The Inspector shows information on the selected object - whether it's a GameObject (objects that exists in a scene) or an asset. This is also used to manipulate the data of GameObjects, as well as the import settings of imported assets.
- The Project Window is basically a file explorer that shows all files in the Assets window, as well as all files imported through Unity's Package Manager.
- The Console (normally not visible to new users) shows console output printed by the game, usually to debug or point out errors. To show the console, press Ctrl+Shift+C or open Window > General > Console.
Section 2 - Setting up the Project
Cleaning Up the Template Project
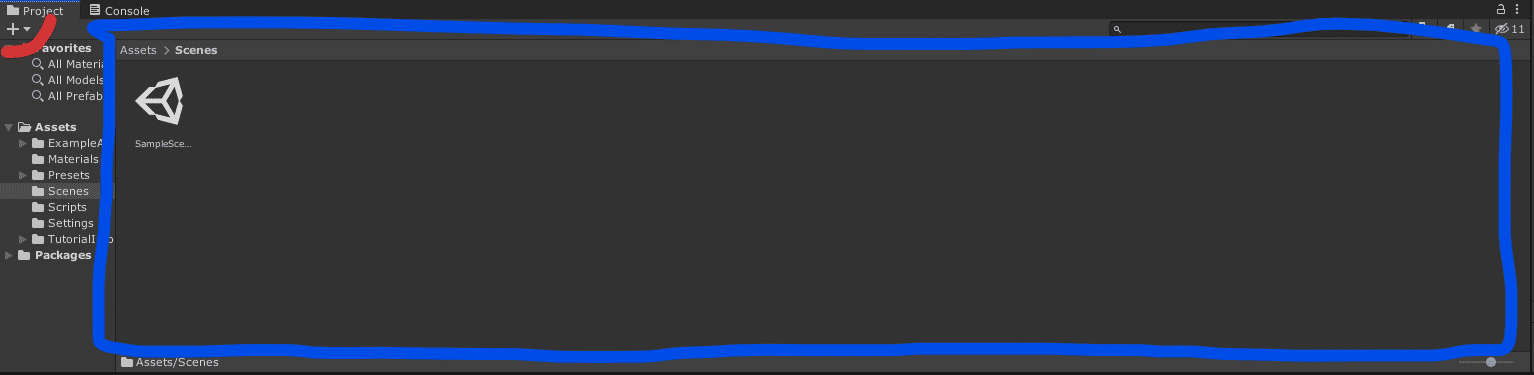
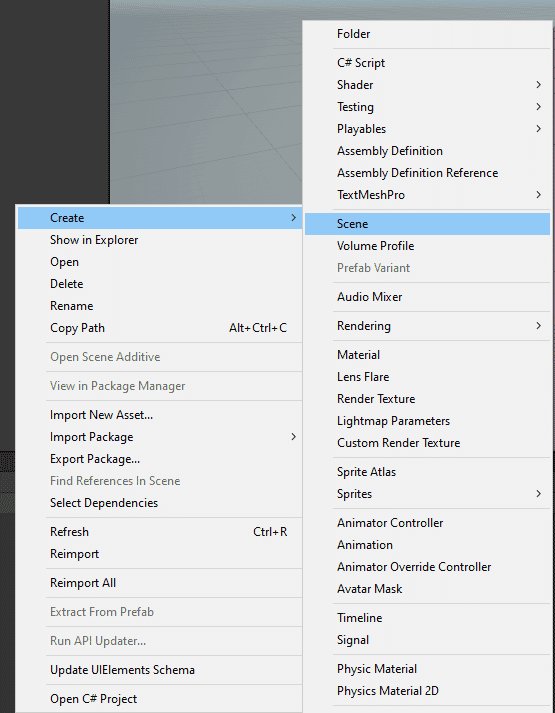
Let's start by making a new empty scene. Open the Scenes folder in the Project Window. Add a new scene by pressing the plus button on the top left of the Project Window (red highlight), or right click on an empty space on the window (blue highlight) and select Create.
Select Scene to add a new Scene.
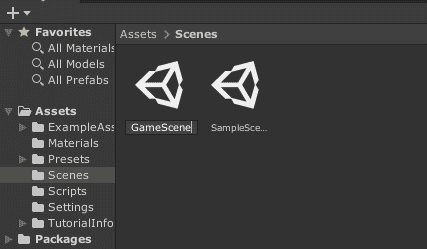
Name the scene whatever you want. Here we name it with GameScene.
Double click the new scene to open the scene. The scene view should now present a blank scene with a camera and a light source. Now, you can remove the SampleScene from the Scenes folder. You can also remove other files in the Assets folder except for the Settings folder. The assets that you can delete are the ExampleAssets, Materials, Presets, Scripts, & TutorialInfo folder, and the Readme asset.
Setting Up the Scene
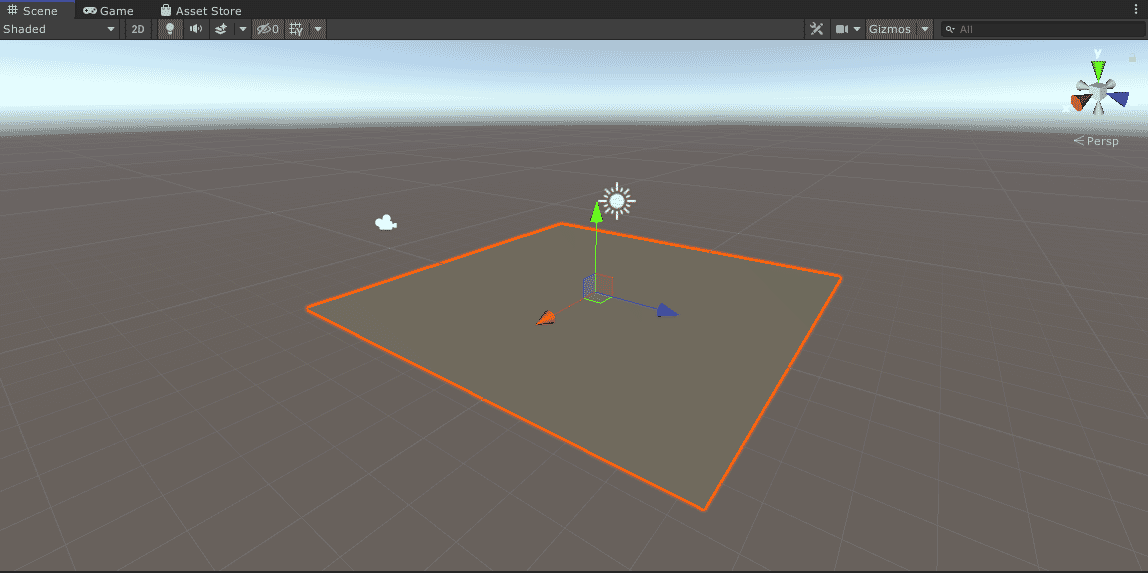
Now that we have an empty scene, let's create a plane. This plane will be the ground where the player will stand. Left click on the plus sign at the top left corner of the Hierarchy Window, or right click on an empty space inside the Hierarchy Window. Then, select 3D Object > Plane to create a new plane GameObject.
A GameObject is an object that can be instantiated in the scene. These objects can exist both in the scene, or as a saved asset called Prefabs.

A new plane has appeared in the scene view.
The plane is initialized with several components: Transform, Mesh Filter, Mesh Renderer, and Mesh Collider Component.
The Mesh Filter binds the GameObject with a certain Mesh / 3D model. The Mesh Renderer applies a material (explained later) to the 3D model, and displays it to the scene, respecting the lighting in the scene.
The Mesh Collider is a subtype of Collider. Colliders are used in collision detection - they are used to calculate the physical shape and bounds of the GameObject. A Mesh Collider is a collider with the shape of a Mesh.
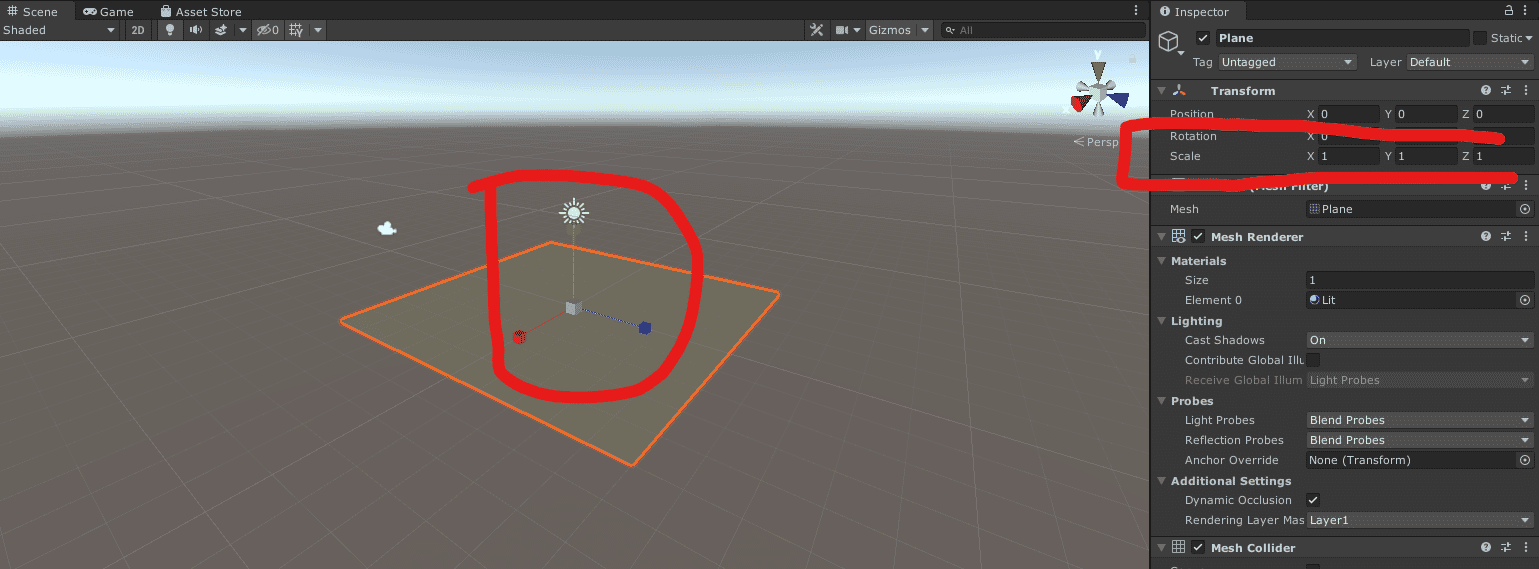
We also want the plane to be centered on the scene. To do that, press the menu button on the Transform Component in the Inspector Window, and press Reset to reset all Transform variables to their default values.
A Component holds the properties of a GameObject. Components can also run code and thus do certain things.
The Transform Component holds the transform properties of an object, i.e. the position, rotation, and scaling (sizing) of the object relative to its parent GameObject.

We also want the player to have enough space to move around. To do this, let us scale the plane to a size that is large enough. Use the Scale Tool, or edit the Scale values inside the Transform Component to around 2,2,2.
Additionally, we can rename the plane to 'Ground' by clicking the name of the plane again after selecting it, or editing the name field at the top of the inspector

The color of the plane looks dull. We can give it a brighter color by assigning a material to it.
A material is an asset that can be assigned to a renderer. When a 3D object is given a material, its color and textures changes, while its shape stays the same. Materials defines how the surface of the object looks relative to the camera.
Go to the Assets folder in the Project Window and add a new folder. Similar to creating a new scene, click the plus icon on the top left corner of the Project Window, or right click on an empty space in the Project Window and select Create. Then, select Folder to create a new folder. Name the folder 'Materials' so we know that it is where we will put all of our materials in.

Open the Materials folder, and add a new material by selecting Create > Material the same way we did made the folder. Name the new Material 'Ground'.
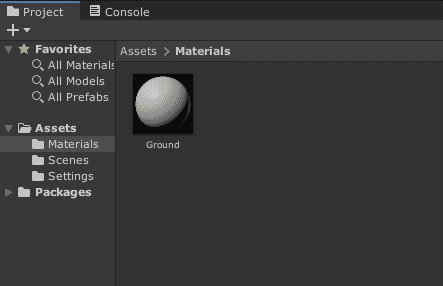
Now select the new Ground material, make sure it is highlighted, and notice that the properties of this material appeared in the Inspector, as well as a preview of the material of the bottom of the Inspector.
To assign the material to the plane, drag the material into the plane in the Scene View. Notice that the color of the plane changes after we dragged the material to it.

Notice how the material is also referenced in the Mesh Renderer Component, inside the materials field. This is because the material is automatically set when we dragged the material to the object.

Even though the preview of the material shows white, the plane in the scene view has a slight yellow tint. This is because the light source in the scene has a yellow tint to it. To remove the tint, first select the light source by clicking it in the Scene View or the Hierarchy. In the Inspector, click the field with the label 'Color'.

A color picker window should appear after clicking the field. You can use the slider or the square to change the color to white.

Right away, you can see that the plane turns white.
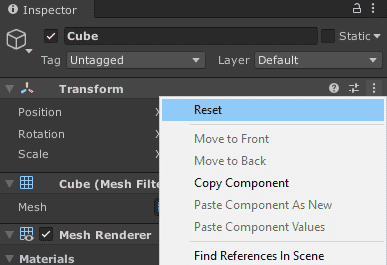
Next, we will add a new object for our player. Add a new Cube GameObject in the scene from 3D Object > Cube.

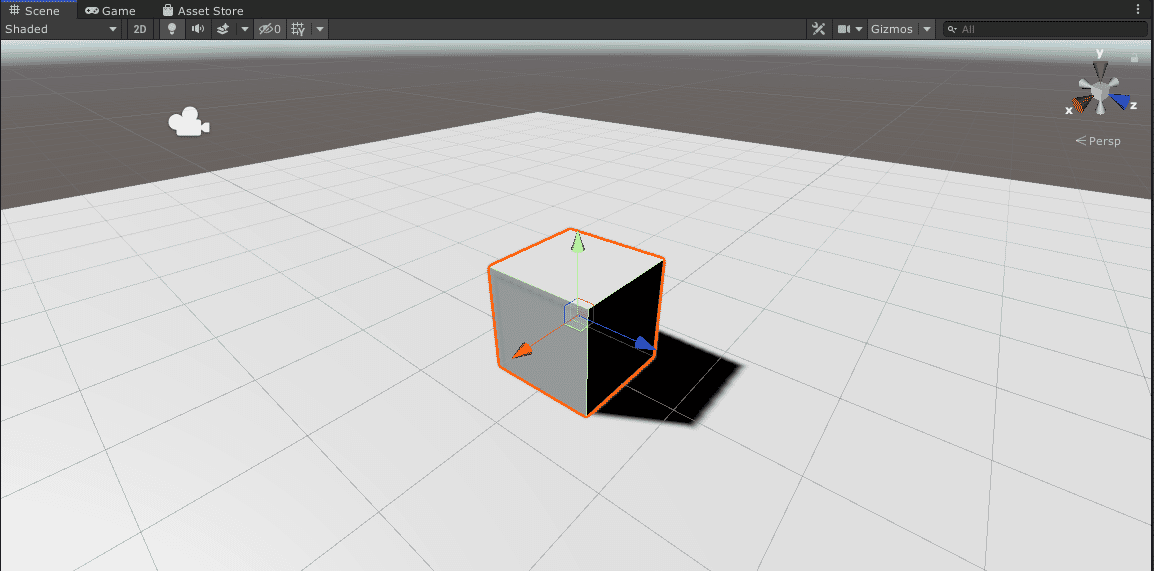
To center the cube in the scene, left click on the menu icon of the Transform Component and select Reset.
The cube is now intersecting the plane. To make our player rest on the ground, drag the cube up with the Move Tool or change the Y value of the position in the Transform Component to 0.5.

Also, rename the cube to 'Player' by clicking the name of the plane again after selecting it, or editing the name field at the top of the inspector.

The color of the cube looks quite dull. Let's create a new material and assign it to our player. Create a new material in the Materials folder and name it 'Player'. Then, drag the material to our Player.
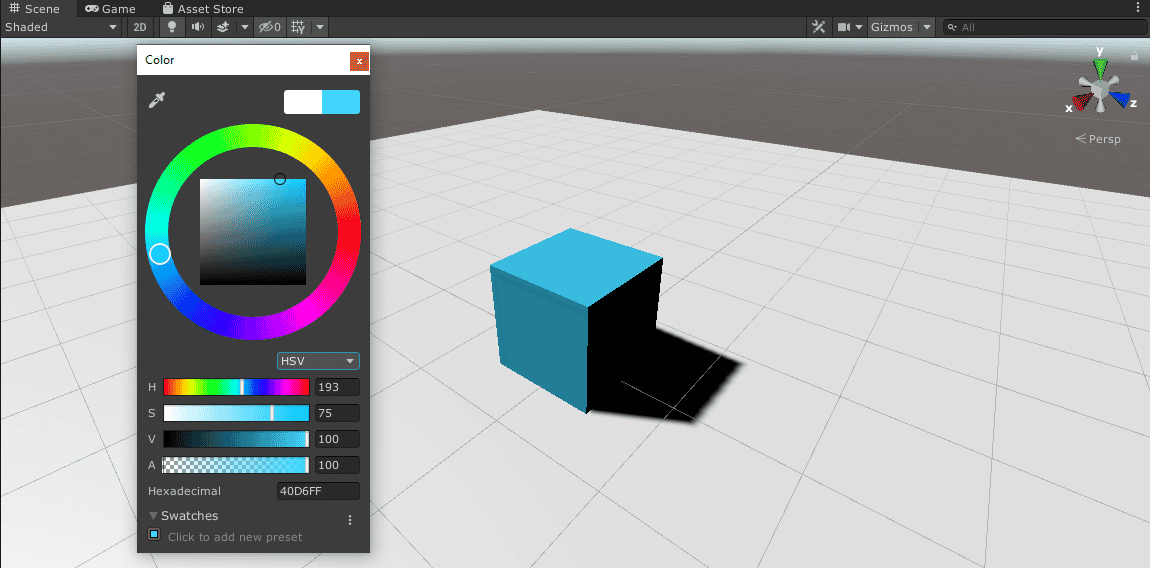
To make the difference between the player and the ground more visible, change the color of the Player material to a more distinct color. Click on the material in the Project Window, and click on the color field with the label 'Base Map'.
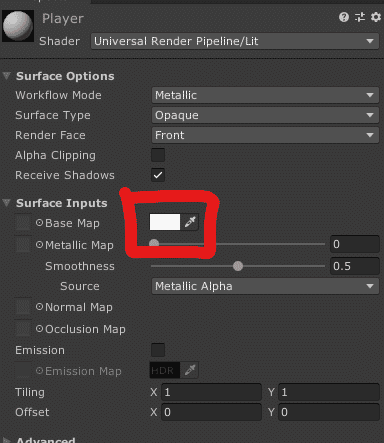
Pick a contrasting color to white. Once you're done, your scene will look something like this.
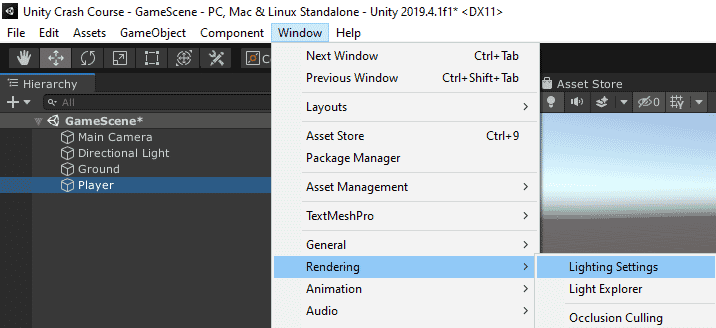
You might also notice the pitch black shadow. In the real world, shadows don't just look pitch black. We can fix this by going in the lighting window. To open it, go to Window > Rendering > Lighting Settings.
Another window should pop up. At the bottom of the window, there is an 'Auto Generate' checkbox and a Generate Lighting button. It is generally a good idea to keep the 'Auto Generate' checkbox on when prototyping, but use the Generate Lighting button manually when building the game & using multiple scenes. This is because the lighting will not automatically generate when switching between scenes. For now, turn on the Auto Generate checkbox.

Right away, we can see a softer shadow in place of the pitch black shadow.

Section 3 - Player Movement
Creating a New Script
To move the player, we need to first detect the player input, and setting a velocity to move the player in the direction of the input. To access the player input, we need to use scripts. Add a new folder in the Assets folder and name it 'Scripts'.

In the Scripts folder, create a new script by selecting Create > C# Script, and immediately rename it to 'PlayerController'.

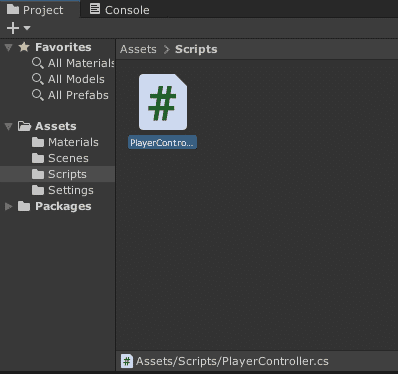
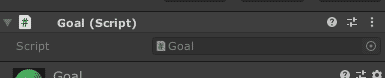
If done correctly, when selecting the script, the inspector should show the following text.

If the class name shows anything other than PlayerController, delete the script and redo the last step. Afterwards, double click on the script to open it in Visual Studio (or your prefered text editor). You can see that there is already some template code (the same as the one in the inspector).

The first three lines shows that the script is using some libraries. The third line is the most important, as it imports some Unity specific stuff, like Input and GameObject.
Line 5 indicates that our new script/class derives from the MonoBehaviour class. Any class that derives from MonoBehaviour can be added to a GameObject as if it was a Component.
The Start function at line 8 is called at the start of the script, which is when the component is enabled, usually at the start of the game. The Update function at line 14 is run every frame, which is useful for, for example, detecting input.
Scripting the Movement
For the player movement, we need to access a component called the Rigidbody Component. This component contains all information and actions related to physics and forces. Let's get the Rigidbody Component by replacing the Start function with this code.
private Rigidbody rb;

// Start is called before the first frame update
void Start()
{
    rb = GetComponent<Rigidbody>();
}
The first line declares a new variable rb. This variable is used to store a reference to the Rigidbody Component of the player's GameObject. The GetComponent function in the Start function is used to get a reference to the Rigidbody Component of the player. It's a good practice to use the GetComponent in the Start function so it will be used sparingly, as GetComponent is quite resource intensive.
It is also a good practice to force the availability of components referenced through code. To do this, add the following line of code on top of the declaration of the PlayerController class.
...

[RequireComponent(typeof(Rigidbody))]
public class PlayerController : MonoBehaviour
{
		...
}
As stated before, we need to check the input of the player before we move it by changing its velocity. To do this, let's change the Update function to FixedUpdate. We strongly recommend the use of FixedUpdate for Physics actions because it runs on a fixed interval - defaults to 50 times per second. FixedUpdate is independent to the FPS of the game, and thus does not give too much load on the FPS.
In the FixedUpdate function, add the following code.
...
// FixedUpdate is called once per fixed framerate frame
void FixedUpdate()
{
		// Getting input
    float xInput = Input.GetAxis("Horizontal");
    float yInput = Input.GetAxis("Vertical");
    Vector3 moveInput = new Vector3(xInput, 0, yInput);
}
...
Input is a class that contains various ways of input for many devices. Here, we are getting the input from the horizontal axis (defaults to A/D and Left/Right) and the vertical axis (defaults to W/S and Up/Down) and saving it to xInput and yInput respectively. When an input is given on the positive direction (forward and right), the axis value is positive, and vice versa for the negative direction (backward and left).
Then, the inputs are saved into a new Vector3 struct named moveInput. Vector3 stores three floats which can be used to represent a three-dimensional vector. Here, we are storing the horizontal input in the x-axis (left and right), the vertical input in the z-axis (forward and back), and leaving the y-axis at zero (up and down).
To make our player move, we need to modify the Rigidbody. Open Unity's scripting reference (https://docs.unity3d.com/ScriptReference/index.html) and search for the term Rigidbody. We should see that the first result links to the Rigidbody documentation. There, we can see that a Rigidbody has a velocity component.
Next, let's add the following code after obtaining the input.
void FixedUpdate()
{
    ...

    // Change the player's velocity
    rb.velocity = moveInput * 10;
}
Velocity is a property of Rigidbody. The velocity attribute is also a Vector3, which gives the Rigidbody the ability to move in all three axis. Here, we set the velocity based on the input the player gives and multiply it by 10 to increase the velocity.
Here is how the code should look now.
using System.Collections;
using System.Collections.Generic;
using UnityEngine;

[RequireComponent(typeof(Rigidbody))]
public class PlayerController : MonoBehaviour
{

    private Rigidbody rb;

    // Start is called before the first frame update
    void Start()
    {
        rb = GetComponent<Rigidbody>();
    }

    // FixedUpdate is called once per fixed framerate frame
    void FixedUpdate()
    {
        // Getting input
        float xInput = Input.GetAxis("Horizontal");
        float yInput = Input.GetAxis("Vertical");
        Vector3 moveInput = new Vector3(xInput, 0, yInput);

        // Change the player's velocity
        rb.velocity = moveInput * 10;
    }
}
Save the script (usually Ctrl+S) and head back to Unity. Unity might not respond for a bit while it is compiling the code.
Before testing our script, we need to add the PlayerController Component to our player. To do this, select the Player, and press the 'Add Component' button at the bottom of the inspector. The new component will appear under Scripts > Player Controller.
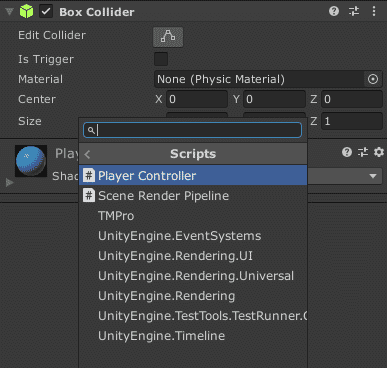
Alternatively, you can drag the script asset in the Project Window into the Inspector with the Player selected.
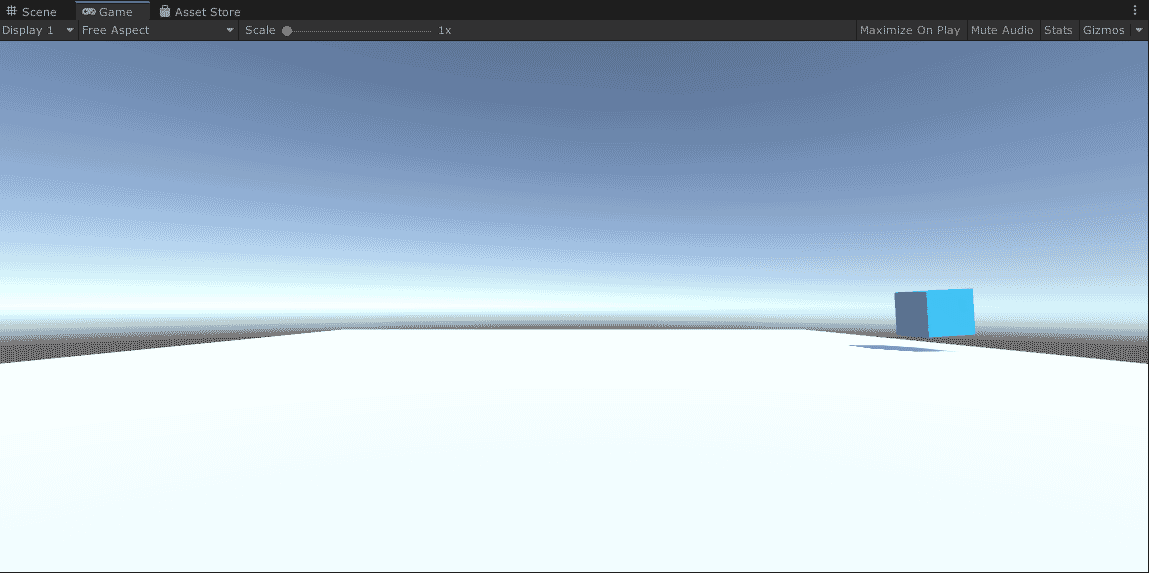
A Rigidbody Component and a Player Controller Component has appeared in the Inspector. With the Player Controller script attached, we can try out our game by pressing the play button on the toolbar at the top of the screen.

The Scene View will switch to the Game View when the game starts. If you keep holding any direction, you will notice that the block will start to tumble in the direction you are holding.
There are two things that we need to fix. First, we want our player to slide across the ground and not tumble. Second, like most properties in other components, we want to be able to control the movement velocity of our player through the Inspector.
Section 4 - Improving the Player's Movement
Tumbling Prevention
To make our player slide, we need to reduce the friction to the ground. To make this happen, we will need a new Physics Material asset.
A Physics Material is an asset that can be used to describe some physical properties.
Let's make a new folder and name it 'Physics Materials'. Inside, add a new Physics Material and name it 'Slippery'.

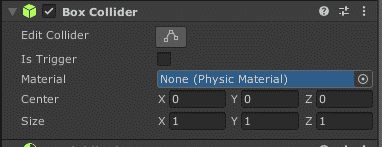
Reduce the Dynamic Friction and Static Friction property of the new physics material to 0 from inside the inspector. To assign the new Physics Material, select the player and drag the new Physics Material to the Material property inside the Box Collider.
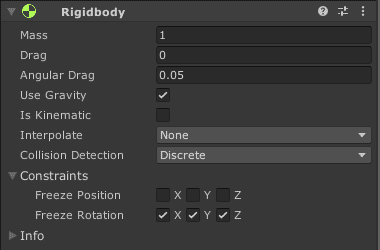
Another useful property is the Constraints property of Rigidbody. Open the Constraints dropdown and lock the rotations on the X, Y, and Z axis.
Revealing Properties to the Inspector
By revealing properties to the inspector, we can make our game more dynamic and reduce hardcoded values. This means we can reduce our production time when trying out values and make it easier for us to make variants/assign references.
We want to be able to change the player's speed from the Inspector. First, we will add a new public property and call it moveSpeed. Assign a default speed of 10 to it.
[RequireComponent(typeof(Rigidbody))]
public class PlayerController : MonoBehaviour
{
    public float moveSpeed = 10;

    private Rigidbody rb;

		...
}
Next, let's change the multiplier for moveInput to moveSpeed.
void FixedUpdate()
{
    ...

    // Change the player's velocity
    rb.velocity = moveInput * moveSpeed;
}
This is how the code looks so far.
using System.Collections;
using System.Collections.Generic;
using UnityEngine;

[RequireComponent(typeof(Rigidbody))]
public class PlayerController : MonoBehaviour
{
    public float moveSpeed = 10;

    private Rigidbody rb;

    // Start is called before the first frame update
    void Start()
    {
        rb = GetComponent<Rigidbody>();
    }

    // FixedUpdate is called once per fixed framerate frame
    void FixedUpdate()
    {
        // Getting input
        float xInput = Input.GetAxis("Horizontal");
        float yInput = Input.GetAxis("Vertical");
        Vector3 moveInput = new Vector3(xInput, 0, yInput);

        // Change the player's velocity
        rb.velocity = moveInput * moveSpeed;
    }
}
If we return to Unity, we should see a new property appear inside the Player Controller Component of the player.

We can change the value to whatever we want and the effects will apply immediately in the game. To try it out, start the game with the play button on the top of the window. Try moving around. Then, without exiting the game, change the move speed to a significantly different value, for example from 10 to 1. When you move, you should notice that the speed of the cube changes according to the value of Move Speed.
Camera Tracking
When we play our game, you might notice that the camera is facing horizontally straight towards the cube. We want our camera to look at our player from an angled top-down view. To achieve this, you may play around with the camera's transform. I find that having (0, 9, -5) for the position and (60, 0, 0) for the rotation is a good setting.

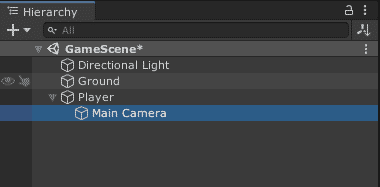
Now, when we play, we will be able to see our player from a bird's eye view. However, the camera does not follow the player. To fix this, we can set the parent of our camera to our player. We do this by dragging the Main Camera in the Hierarchy and dropping it on Player. You should now see that the Main Camera will appear indented, below the Player. A dropdown arrow will also appear beside the Player.
If we start the game, we should see that the camera follows the player's movement. However, this system might fail when the player can rotate around. This is because parenting will also affect the parent's rotation and position relative to the parents position and rotation. This is not a problem in our game, but it is generally not a good idea to use this approach.
To fix this, we can move the camera relative to the player's world position. Undo the parent, and create a new script in the Scripts folder. Name the new script FollowCamera, and open the script. You should see a similar template code to the one for the PlayerController script.
In FollowCamera, we want to update the camera's position relative to the player based on the defined relative position. To access the player's position, we need a reference to the player's Transform Component. Let's add the following code to the start of the class.
public class FollowCamera : MonoBehaviour
{
    public Transform player;
    public Vector3 relativePosition;

		...
}
The player variable will be used as our reference to the player, which we will assign from the inspector. The relativePosition variable will be used to store the relative position between the camera and our player.
Next, we will need to access the position of the player to be compared with the camera's position. Let's head back to Unity's scripting reference (https://docs.unity3d.com/ScriptReference/index.html) and search for the keyword 'Transform'. Again, we see our search term at the top of the results. Click on the link to open the documentation on Transform. If you look closely, the Transform class has a position property that we can use.
We also need to get the camera's transform for the comparison. We can create a new Transform reference that we can use to compare the positions. However, there is a much better way to achieve this. If we look for MonoBehaviour in Unity's scripting reference (remember, MonoBehaviour is the parent class of the components we make), we should see that our MonoBehaviour has a transform property. Based on the description, we can use the property to get the GameObject's Transform Component.
We have to move the camera to a position relative to the player. Because this functionality is related to the camera, and hence the rendering, it is advised to run this functionality in the Update function. This is because we want to update the camera's position for every frame. Add the following code inside the Update function.
// Update is called once per frame
void Update()
{
    transform.position = player.position + relativePosition;
}
This is how the code should look so far.
using System.Collections;
using System.Collections.Generic;
using UnityEngine;

public class FollowCamera : MonoBehaviour
{
    public Transform player;
    public Vector3 relativePosition;

    // Update is called once per frame
    void Update()
    {
        transform.position = player.position + relativePosition;
    }
}
With that, we are done with the camera follow script. Head back to Unity, and add our new Follow Camera Component to the Main Camera by selecting 'Add Component' or dragging the new script to the Inspector.
Set a reference to the player by dragging the Player from the hierarchy to the Player field in the Follow Camera component in the Inspector. Then, set the relative position of the Camera to the Player. Setting the relative position to (0,9,-5) is a good option.

When we play the game, we should now see that the camera follows the Player similar to when we parented the camera to the player.
Section 5 - Setting a Goal
Creating the Goal
In this game, the player's goal is to get to the exit to win the level. Let's add a new cube and place it inside the ground. This will be the goal the player should reach. Name it 'Goal', and assign a new material to it.

We want to trigger our win condition when our player enters the goal. However, when we try to play the game, you should notice that our player refuses to enter the green area. This is because the collision of the goal prevents our player to move inside it. To prevent this, we are going to set the Is Trigger field in the Goal's Box Collider to true.
Labeling a Collider as a trigger removes the 'solid' property of the collider. Triggers are useful to detect the presence of another collider inside the bounds of the Trigger. We are going to use this feature to detect the presence of the player inside the goal.
Let's create a new script for detecting the presence of the player inside the goal. Create a new script in the Scripts folder and name it Goal. Open the new script to edit it.
If we look at the scripting reference for MonoBehaviour, we should see an OnTriggerEnter message available to MonoBehaviour. If we look at the linked page, we could see that the message sends a Collider, and is run when a non-trigger starts intersecting with a trigger collider.
Let's remove the Start and Update function, and replace it with an OnTriggerEnter function.
public class Goal : MonoBehaviour
{
    private void OnTriggerEnter(Collider other)
    {

    }
}
Next, let's check whether the other collider belongs to the player. To do this, we can assign a tag to the player GameObject. Head back to Unity and select Player. At the top of the Inspector, there is a tag dropdown. Click on the dropdown and select the Player.

Now, our player has been assigned the tag 'Player'. To check the tag inside the script we need to access the tag property of the GameObject. Inside the OnTriggerEnter function, add the following code.
private void OnTriggerEnter(Collider other)
{
    if (other.gameObject.tag == "Player")
    {
        print("YOU WIN");
    }
}
The if statement checks whether the tag of the GameObject is equal to 'Player'. If so, the code prints "YOU WIN" inside the console. The print function is useful for debugging code quickly by outputting to the console.
This is how the code looks so far.
using System.Collections;
using System.Collections.Generic;
using UnityEngine;

public class Goal : MonoBehaviour
{
    public GameObject winText;

    private void OnTriggerEnter(Collider other)
    {
        if (other.gameObject.tag == "Player")
        {
            print("YOU WIN");
        }
    }
}
In Unity, add the new Goal component to the Goal GameObject.
Then, start the game and try to enter the goal. You might notice that "YOU WIN" have popped out at the bottom corner of the window.
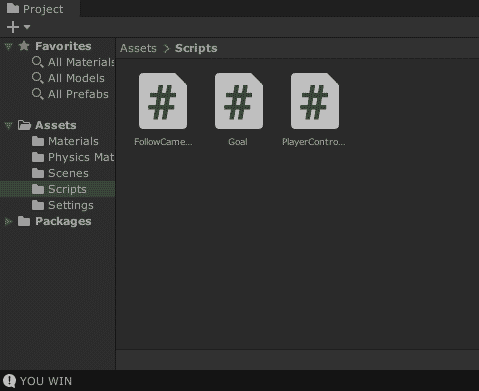
Click on the text to open up the console. The Console will open as an undocked window. The Console also shows the time when the message is printed into the console. As it is a useful window to use, you might want to dock the console somewhere in the window. Here, I docked the console next to the Project Window.

With this, we know that we have successfully won the game. However, when our game is published, the player cannot see the console and thus does not know whether they have won or not. Thus, we will need to add an indicator that shows that the player have won the game.
Showing the Win Screen
We are going to show the player that they have won by displaying a "YOU WIN" text on the screen when touching the goal. We are going to use an on-screen UI to display this text. For this, Unity comes with a Canvas and Text object.
Canvas is mostly used to display UI on the screen. The Canvas can display straight to the screen, attach to a Camera, or appear in the world as any other GameObjects. Canvases are usually used for HUDs or menu screens.
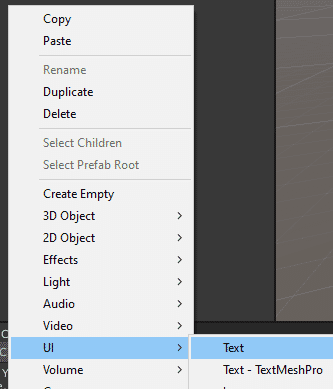
Let's create a new Text GameObject by selecting UI > Text. When doing this, Unity will automatically add a new Canvas GameObject to render the text, and an EventSystem GameObject.
The EventSystem GameObject handles incoming input for the Canvas. EventSystem makes navigation in UI easier and with less code.
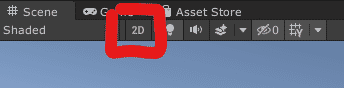
To view the Canvas, select the Canvas in the Hierarchy. Place the mouse pointer on the Scene View and press F. Pressing F with the mouse pointer on the Scene View puts the selected object into Focus (hence the shortcut F). To make it easier to see, set the Scene View to 2D mode by pressing the 2D button at the top of the Scene View Window.
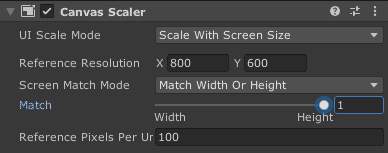
Although not required, we recommend that you set the Canvas to scale with the screen. You can do this by selecting the Canvas and changing the UI Scale Mode field on the Canvas Scaler to "Scale With Screen Size". We also recommend setting the Match field completely to 'Height'.
You might also notice a different kind of Transform inside the Canvas and Text GameObjects. RectTransforms are exclusive to Canvases and GameObjects within a Canvas. These Transforms contain controls commonly used in UI on top of the usual position, rotation and scale values.
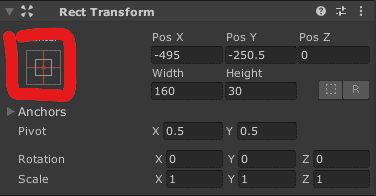
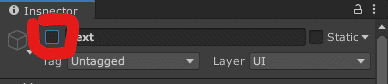
To make the text more visible, we can select the text and align it to the center. To do this, click on the box next to the position and size values of the Rect Transform Component.
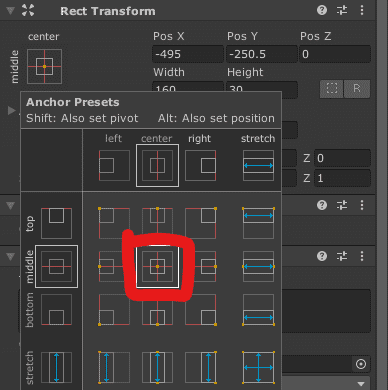
Then, click on the center configuration whilst pressing Alt to set the position to the center.
Next, set the text name to "YOU WIN" and set the sizing and positioning to make it easier to see.

To make the text only appear when the player enters the goal, let's deactivate the text, and activating it only when the player enters the goal. Deactivating a GameObject also disables it's components, thus it will not render, collide, or even run code from a script's Update and FixedUpdate function.
Let's deactivate the text by selecting the Text GameObject and unchecking the checkbox beside the name in the Inspector
Next, edit the Goal script, and add a reference to the Text GameObject.
public class Goal : MonoBehaviour
{
    public GameObject winText;

		...
}
Then, replace the debug text with the following code.
private void OnTriggerEnter(Collider other)
{
    if (other.gameObject.tag == "Player")
    {
        winText.SetActive(true);
    }
}
This is how the code looks so far.
using System.Collections;
using System.Collections.Generic;
using UnityEngine;

public class Goal : MonoBehaviour
{
    public GameObject winText;

    private void OnTriggerEnter(Collider other)
    {
        if (other.gameObject.tag == "Player")
        {
            winText.SetActive(true);
        }
    }
}
Now, if we head back to Unity, we can assign a reference of the Text to our Goal by dragging the GameObject from the Hierarchy to the Win Text field of the Goal in the Inspector. We can now test out the new win pop up. When we touch the goal, the new text will show up.
Section 6 - Level Creation
Creating Hazards
They say, "A game is not a game without a challenge." No don't quote me on that. But to make things more challenging to the player, let's make a hazard. This hazard will respawn the player to their starting position.
Let's start by setting up the hazard in our play scene. This hazard will work in a similar basis to the goal. When the player touches the hazard, however, instead of winning, it will respawn.
If you haven't already, let's unfocus from the Canvas and focus on the scene by pressing F with the mouse pointer on the Scene View and the Ground GameObject selected. You can also exit out of 2D view by pressing the 2D icon on the top of the Scene View window.

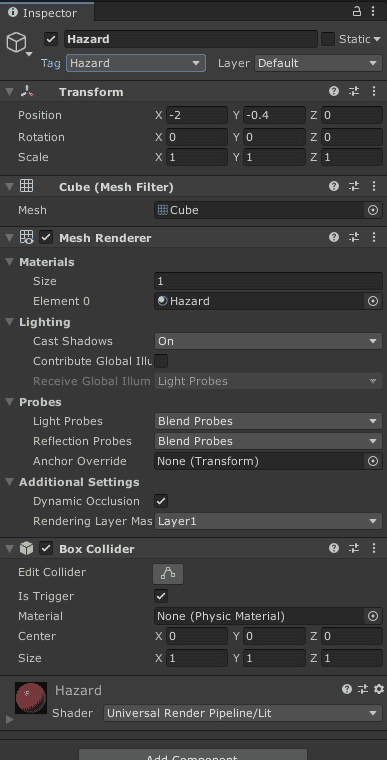
Now, create a new Cube GameObject by selecting 3D Object > Cube in the Hierarchy. Name it 'Hazard' and make sure it intersects with the ground, similar to the Goal. Create a new material and give it a new color to show that the tile is hazardous.
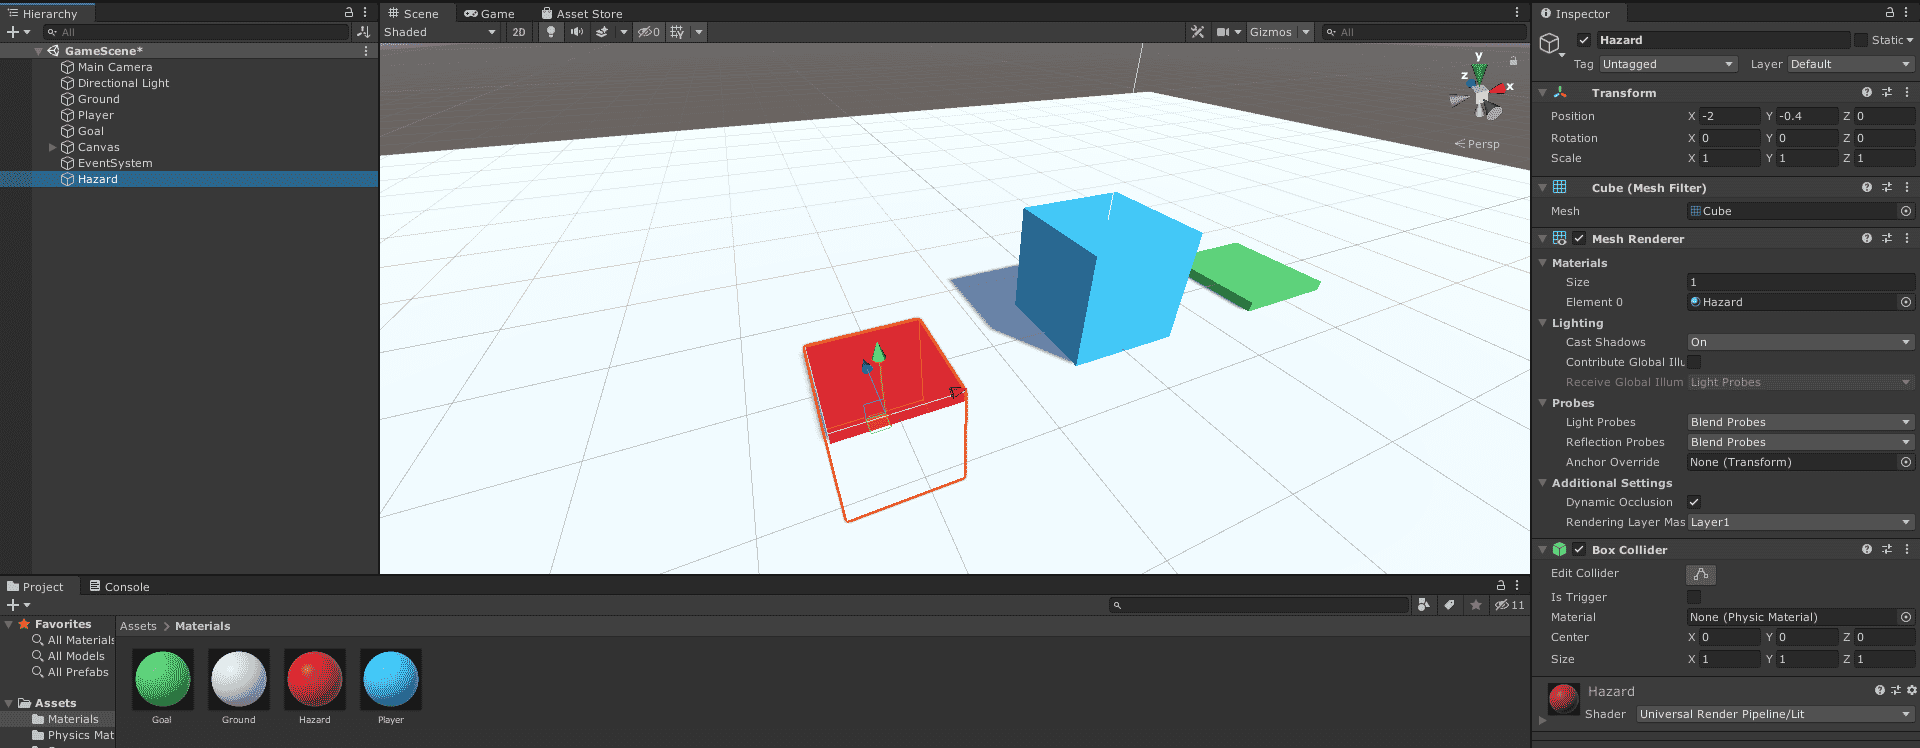
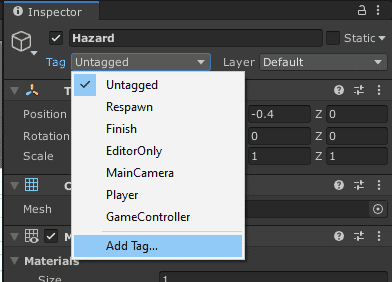
Then, set the collider as a trigger so we can detect when a player enters it. Lastly, let's make a new tag for the Hazard so that we can tell from the script that this object is a hazard. To do this, with the Hazard GameObject selected, open the Tag dropdown at the top of the Inspector. There, you select the "Add Tag..." selection.
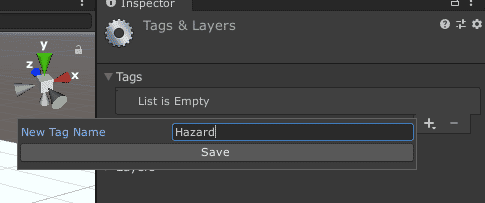
The Inspector will now show the Tag & Layers options. Open the 'Tags' section if it is not open already, and then press the plus (+) icon at the bottom of the list. (The list should be empty at this point, indicated by the "List is Empty" label). On the new pop up, set the tag name to 'Hazard' and press Save.
A new item will appear on the list with the name Hazard. Next, reselect the Hazard GameObject and add the new Tag by opening the Tag dropdown at the top of the Inspector and select 'Hazard'. This is how the Inspector should look at this point.
Respawning the Player
Now, start by implementing the respawn mechanic. Open the PlayerController script and add the following field.
public class PlayerController : MonoBehaviour
{
    public float moveSpeed = 10;

    private Rigidbody rb;
		private Vector3 respawnPosition;

		...
}
The new respawnPosition variable will store the player's starting position, which will be the position where the player will respawn. Next, in the Start function, let's store the player's starting position with this line of code.
...
// Start is called before the first frame update
void Start()
{
    rb = GetComponent<Rigidbody>();

		respawnPosition = transform.position;
}
Next, let's detect when our player touches a hazard, and respawn the player when it happens. Add the following code after the FixedUpdate function.
private void OnTriggerEnter(Collider other)
{
    if (other.gameObject.tag == "Hazard")
    {
        transform.position = respawnPosition;
    }
}
The if statement checks whether the tag of the GameObject is equal to "Hazard". When true, it moves the player to the starting position, hence the respawn mechanic.
This is how the code looks so far.
using System.Collections;
using System.Collections.Generic;
using UnityEngine;

[RequireComponent(typeof(Rigidbody))]
public class PlayerController : MonoBehaviour
{
    public float moveSpeed = 10;

    private Rigidbody rb;
    private Vector3 respawnPosition;

    // Start is called before the first frame update
    void Start()
    {
        rb = GetComponent<Rigidbody>();

        respawnPosition = transform.position;
    }

    // FixedUpdate is called once per fixed framerate frame
    void FixedUpdate()
    {
        // Getting input
        float xInput = Input.GetAxis("Horizontal");
        float yInput = Input.GetAxis("Vertical");
        Vector3 moveInput = new Vector3(xInput, 0, yInput);

        // Change the player's velocity
        rb.velocity = moveInput * moveSpeed;
    }

    private void OnTriggerEnter(Collider other)
    {
        if (other.gameObject.tag == "Hazard")
        {
            transform.position = respawnPosition;
        }
    }
}
Open up Unity and start the game. Now, whenever we touch the red tile, our player's position resets to its original position.
Designing the Level
Now that we have the building blocks, let's make the level. We are going to make an extremely simple maze. Move around the Scene View to get a good look of the scene.

Let's move the player to the bottom left quadrant of the level, and the goal to the top right.

Next, we want to add several hazardous tiles in the level. We can make our tile into a template. These templates are called Prefabs.
Prefabs are GameObjects those are saved as an asset. Prefabs works as a template — it means, when the Prefab asset is modified, all instances of the Prefab will respect the changes. Instances of a Prefab can also modified, making a variant of the original GameObject.
Before making the prefab, let's add a new folder in the Assets folder and name it 'Prefabs'. Then, let's drag the Hazard GameObject from the Hierarchy into the Project Window inside the Prefabs folder.

Notice how the Hazard GameObject shows up as a blue cube in the Hierarchy. The blue cube indicates that the GameObject it represents is an instance of a Prefab.
Let's create a long row of hazardous tiles near the player. To do this, you can scale the existing hazard tile on one axis with the Scale Tool (R).
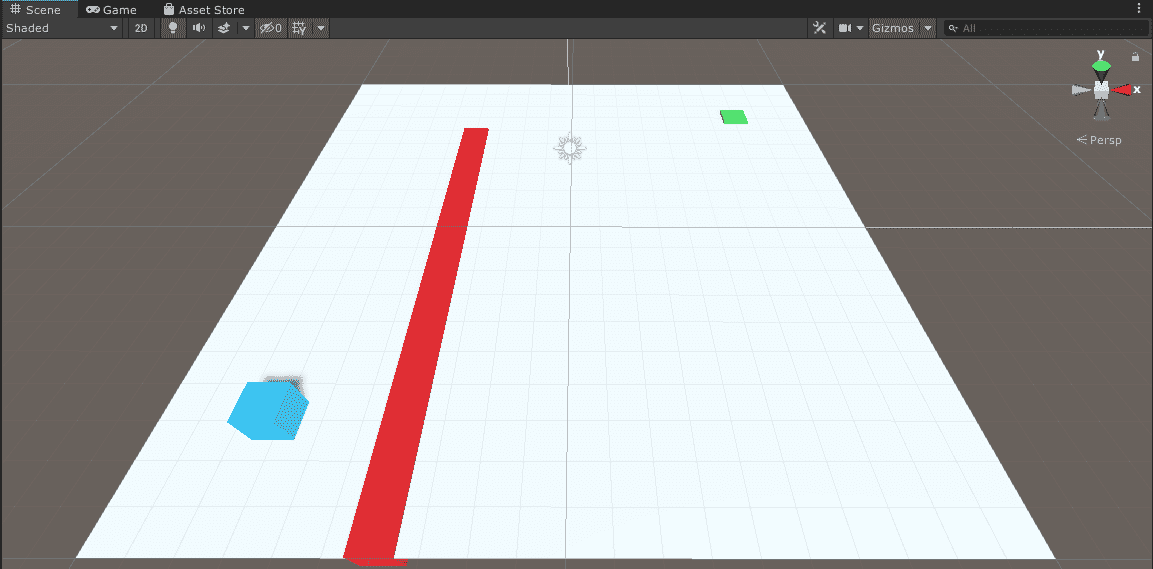
Then, let's create another row of hazardous tiles next to the goal. Drag the new Hazard prefab from the Project into the Scene to create another instance of it.

Afterwards, move and scale it to make it into a row of hazardous tiles.

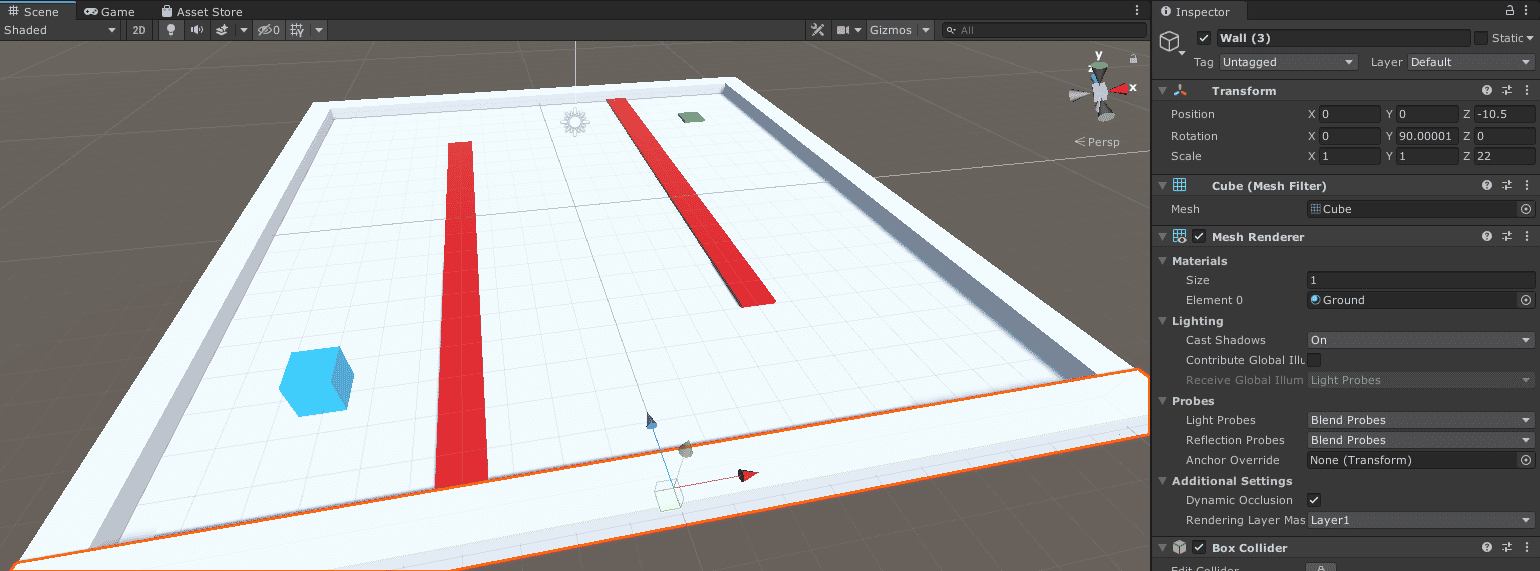
Lastly, let's make some walls as a boundary to the level so the player cannot fall out of bounds. Create a new cube, and name it 'Wall'. Assign it the same material as the ground.
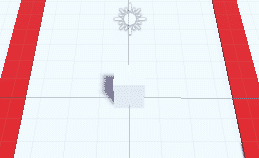
Move the cube to the left side of the level, and scale it to match the size of the level, but increase the length by two units.

Next, let's duplicate the wall to make the right wall. Duplicate it by pressing Ctrl+D on the keyboard with the wall selected, or by selecting 'Duplicate' when right-clicking on the GameObject in the Hierarchy. Then, lets drag the new wall to the right side of the level.

Let's duplicate the wall again to make the back wall. Then, rotate and reposition the cube so that it fits nicely at the back at the level.
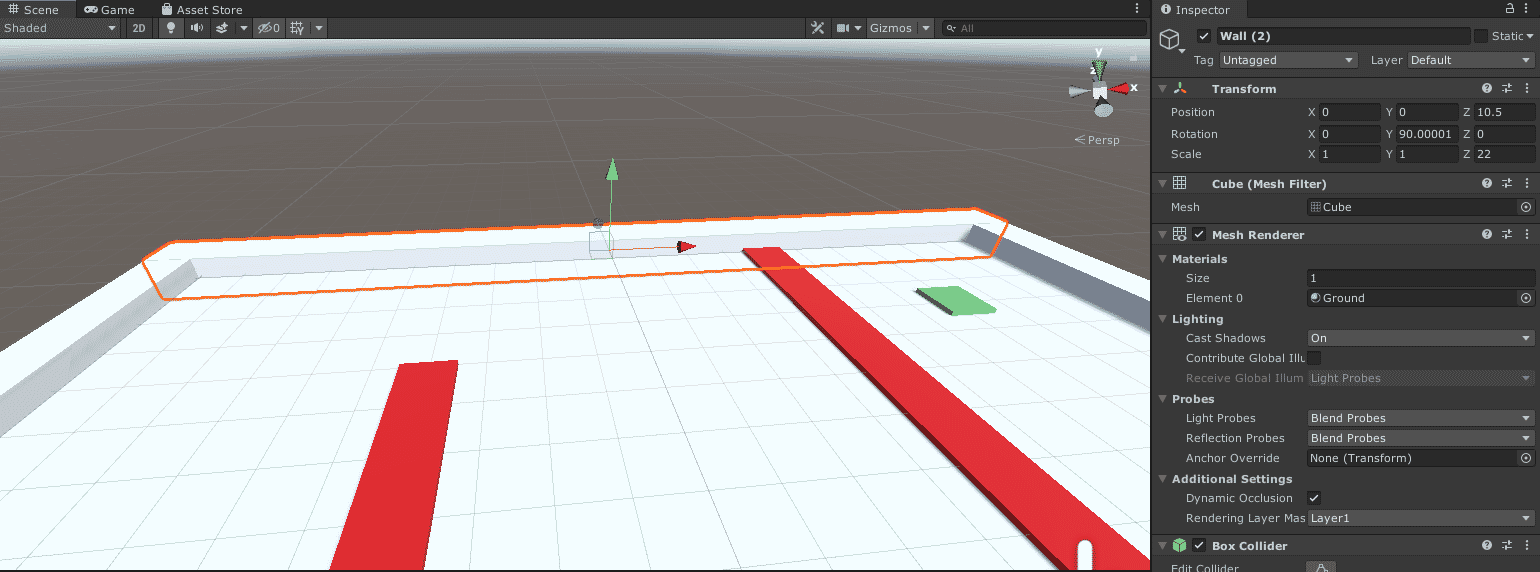
Lastly, duplicate the wall one more time and drag it to the front to make the front wall.
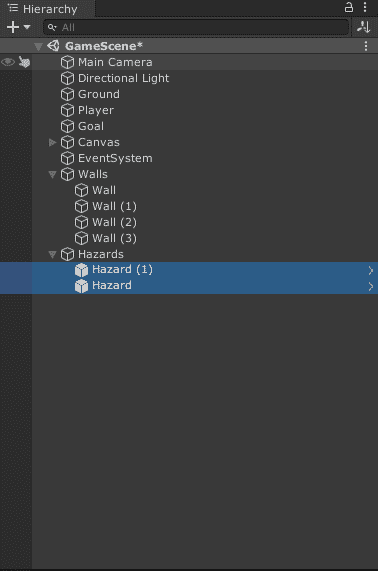
Our Hierarchy now looks like a mess. Let's fix this by grouping the GameObjects. Create two empty GameObjects by selecting "Create Empty" in the Hierarchy, twice. Name one 'Walls' and the other 'Hazards'. Remember to reset their position to (0,0,0) by pressing Reset on the Transform Component.

Next, let's parent all the walls to the Walls GameObject. We can do this by dragging these objects to the Walls GameObject in the Hierarchy. When successful, the walls will be placed indented under the Walls GameObject.

Let's also add the hazardous tiles into the Hazards GameObject.
Now, play the game and try the level out.
Section 7 - Building the Game
After we have finished makin our game, let's build our game to an executable, so that the game can run outside the Unity Editor. Select File > Build Settings... from the top of the Unity window.
Then, press the "Add Open Scenes" button to add your current level to the build.

If there is a deleted scene in the Scenes In Build list, you can delete it by selecting it and pressing the Delete key. (It is the first example scene that we deleted).
Make sure that the "PC, Mac & Linux Standalone" platform is selected. If not, select it and press the "Switch Platform" button at the bottom right corner.
Then, press the Build and Run button at the bottom of the Build Settings window.

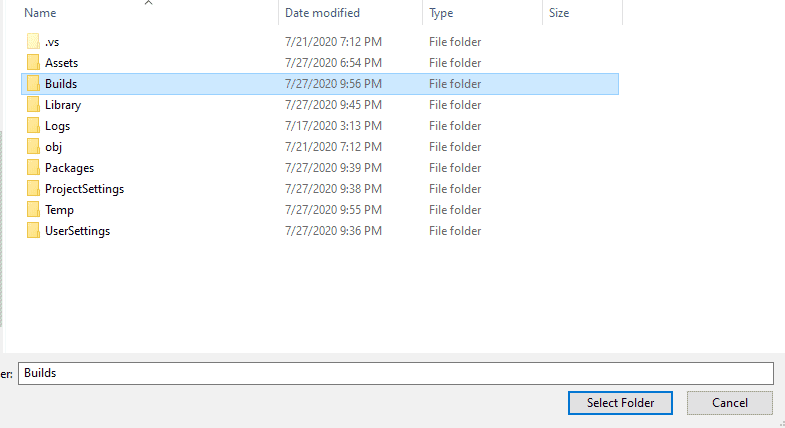
Create a new folder on the project folder and name it 'Builds', and select that folder as the build location.
Build time is much longer on the first time of building. When the Build is done, the program will automatically run.
P.S. Exit the game with Alt+F4 :)
If you have exited the game and want to try it again, open your project folder and access the Builds folder. Your game should be accessible from there.
That's it. You have made your own game. Share it with your friends, or find more tutorials to sharpen your skills. Happy making!